Making Star Trails
Have you ever created a mosaic that didn't turn out quite as you imagined it would? A couple of years ago, at the start of the pandemic, I created a mosaic inspired by images I had seen of star trails. At that time flights had been grounded so it was easier for people to photograph the trails without having to edit out the lines created by planes.
The simplicity of the concentric circles was appealing, but the first mosaic I made inspired by the star trails ended up being more of a swirling spiral! It was not quite what I had intended, but I liked it! I went on to make a second mosaic, building on the swirling design by adding in some larger chunks of rock. Again, I was pleased with it but it was even further from my original vision of star trails than the first one!


So when the call for submissions came for an exhibition titled ‘Constellations’, it seemed the perfect opportunity to have another go. This time there would be more concentric circles and less swirling!
The exhibition curators wanted ambitious works that would work well in the space of the Chapter House at Chester Cathedral. So I prepared a big piece of board, lots of slate and got to work!
I used a mix of slate rods for the trails, combined with black, rough cut slate on its edge for the darker spaces between the stars. But I wanted the work to have colour and sparkle as well, so I picked my favourite mango coloured smalti and some other sparkly tiles to add in.
I drew a few concentric circles on the board to keep me on track and got to work. I didn't start right at the centre though - I think that was my mistake before, when I went all swirly! I started with a clear semi-circle that I could work outwards from.
I took photos as I went along. Sometimes I take photos of work in progress to give me a different viewpoint, or to document the process. But this time the main reason was to remind myself that I was making progress. Sticking thin pieces of slate down is time consuming and each piece does not cover much surface area of the board. I would get to the end of a two hour session and feel like I hadn't got much done at all. The photos reminded me I was getting there!
Here's a few in-progress shots so you can see how the piece developed.
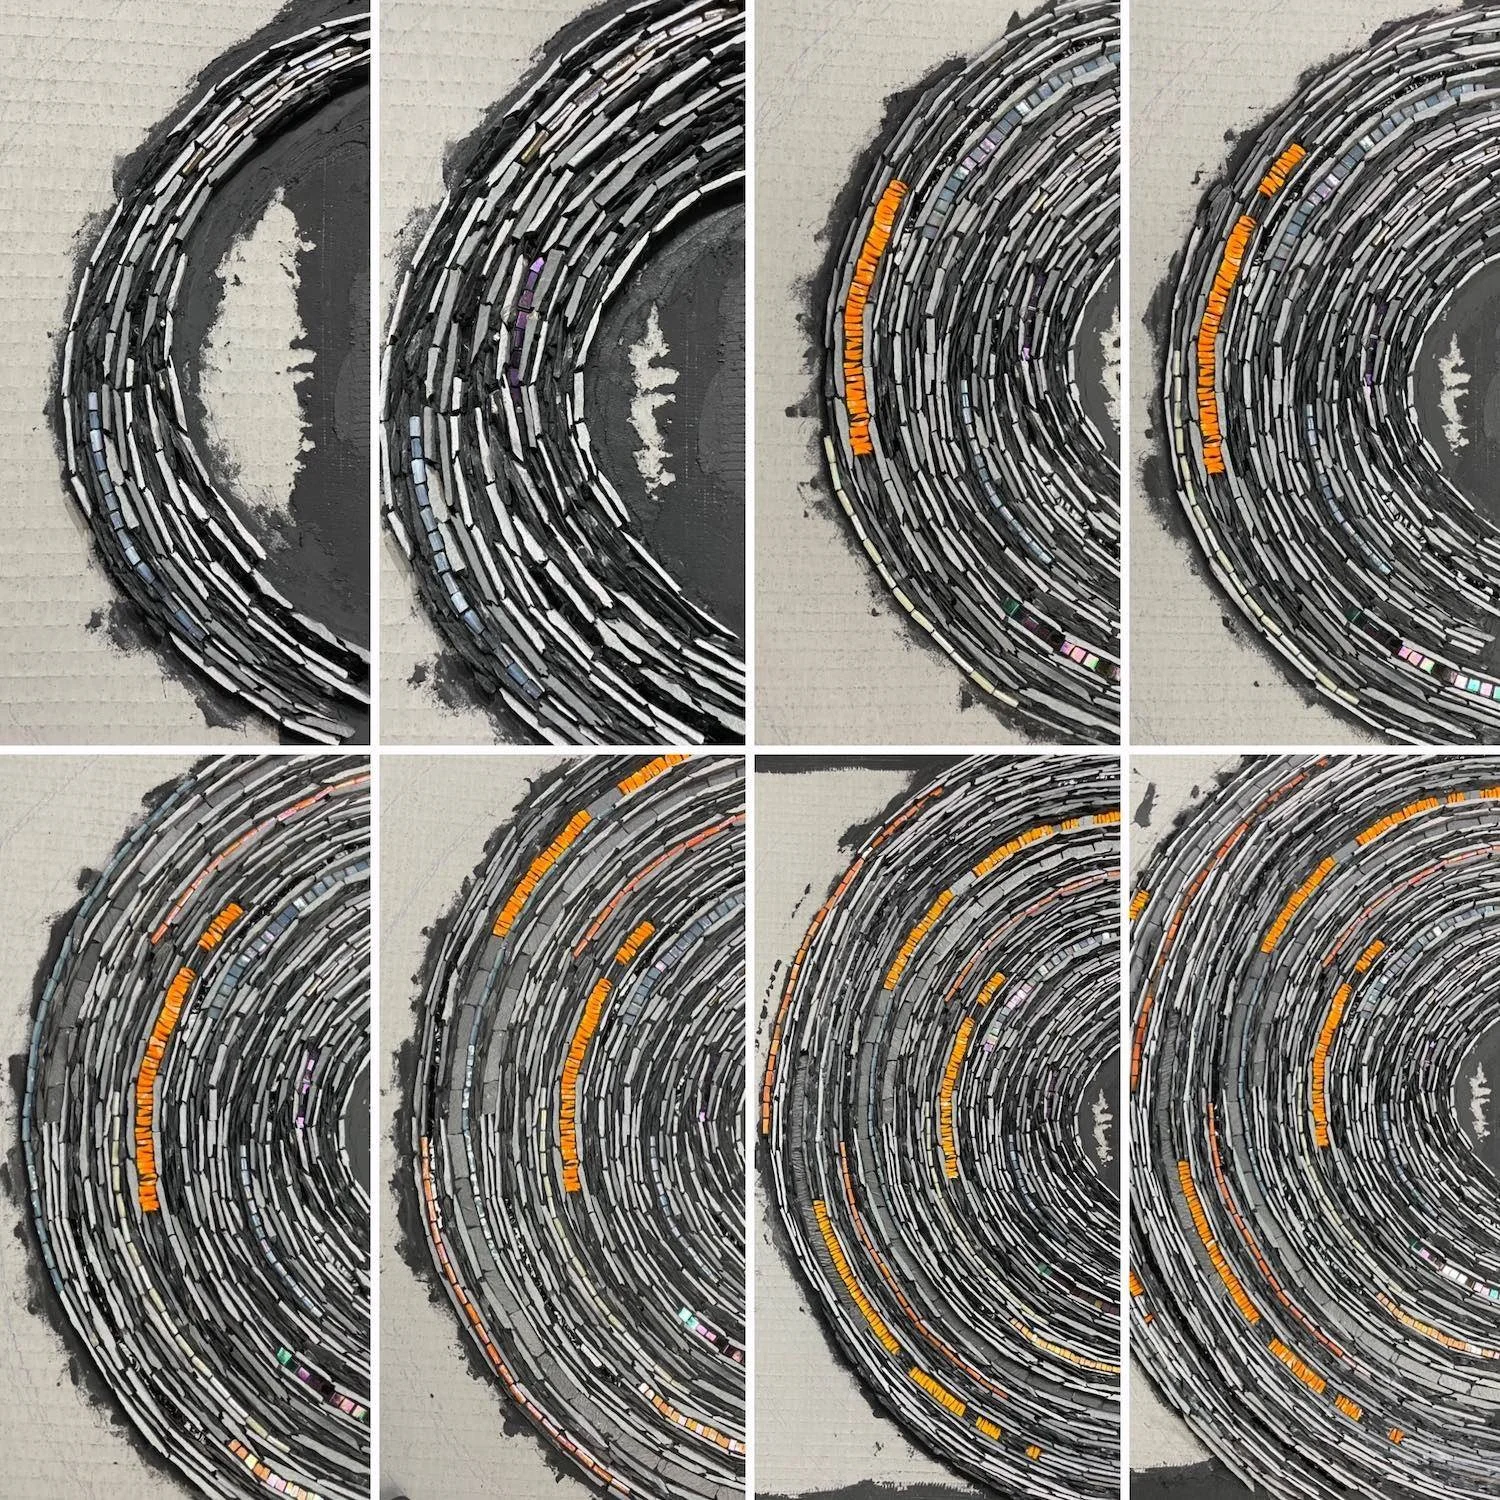
The stage I found the most challenging was the first line of mango smalti. It seemed so bright and I wasn't sure it would work. You can also see that after I set the initial line of smalti, I pulled some bits out to add a second shorter line. I felt this created a bit more of a feeling of movement. The more progress I made and the more lines of colour that I added, the more reassured I felt that it would turn out alright.
When I had completed the last full semi-circle, I let the piece sit for a while on my easel. I needed to decide whether to add in more pieces in the corners or whether it should just be the full circles. In the end I decided to fill in the corners, as the stars are never ending!
I gave the finished piece a final coating of black adhesive round the edges to smooth everything out and it was ready to be displayed! Here's a photo of the finished piece, which measures 80x59cm, along with a close up image.


Finally, in case you find it useful here’s a few learning points to take away from this piece.
If your first mosaic doesn't turn out as planned, try again. You might even end up creating a series of works!
Take work-in-progress shots - they are useful to give you a sense of perspective - both in terms of how the piece is looking and to remind you that you are making progress.
Remember it's best to change things if they don't look right or you aren't happy with them - just do it before the adhesive sets hard.
This blog post was adapted from one of my weekly emails. If you have enjoyed reading it and would like to receive similar content direct to your inbox, you can subscribe using the form at the bottom of the page.