Creating Coastal Rocks
Inspiration for mosaics can come from all sorts of places. In this post I share the details of a piece that evolved from a photograph taken by the coast.
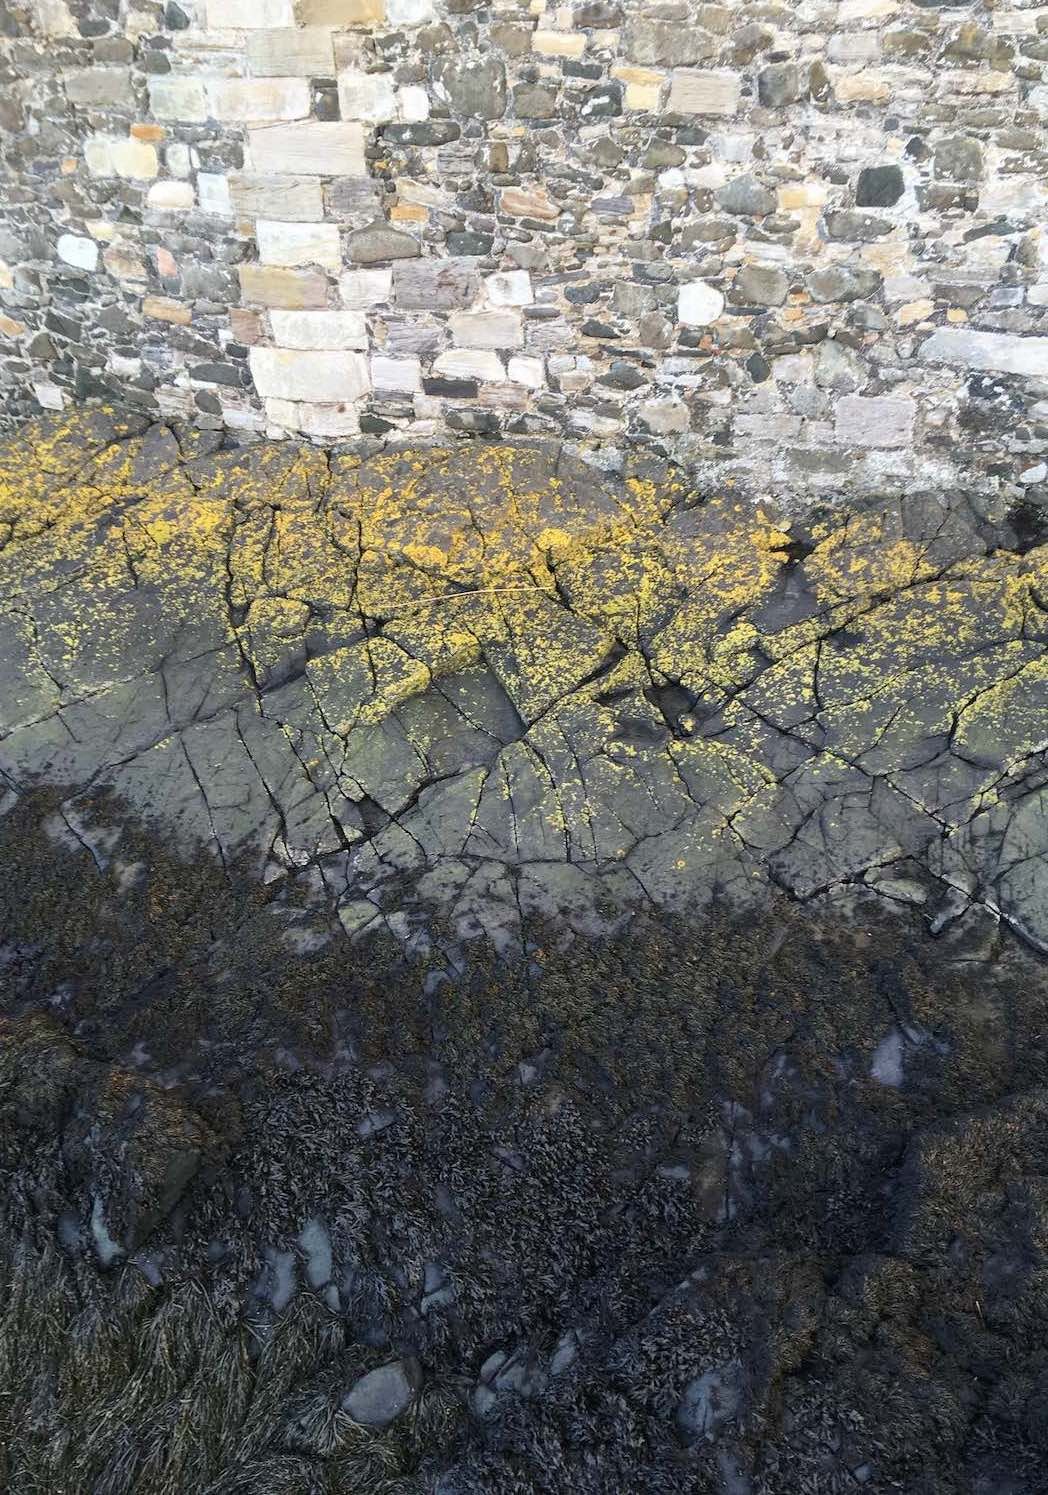
A few years ago we took a family trip to Blackness Castle, which is on the coast of the Firth of Forth in Scotland. While exploring I was drawn to the colours of rocks nearby. They were covered in lichen and seaweed and the yellows, browns and greys made for a pleasing colour palette. I took some photos thinking it might be useful inspiration for a mosaic.
Fast forward a year or two, and I was looking for ideas for mosaics and returned to this photo. I cropped an area I found and made a small mosaic (6x6 inches), using yellow glass for the lichen, slate for the rocks and dried out black tile adhesive for the seaweed area. You can see the cropped photo and the mosaic below.


I really liked how it turned out and decided to go bigger! This time I chose to work on a handmade substrate (18x18 inches). This was because I wanted to leave a black border round the edge, rather than framing the work, and I liked the thin edges of the handmade substrate.
I used mainly glass tile for the lichen, picking out all the shades of yellow I could find and cutting them into matchstick shaped pieces. I mixed them all up in a single container so when I was working my choice of colour would be more random.
The rocks in the image follow pretty clear lines and I wanted to reflect this so I used some larger pieces of slate to start with, then added in smaller pieces to continue the lines. The great thing about the rocks being covered in lichen was that if there were big gaps between the slate pieces, I could just fill them in with yellow glass.
In my sample piece I had used dried black tile adhesive for the seaweed, but on a larger scale, this material just wasn’t doing it for me. The seaweed is actually brown and textured and I wanted something that reflected this.
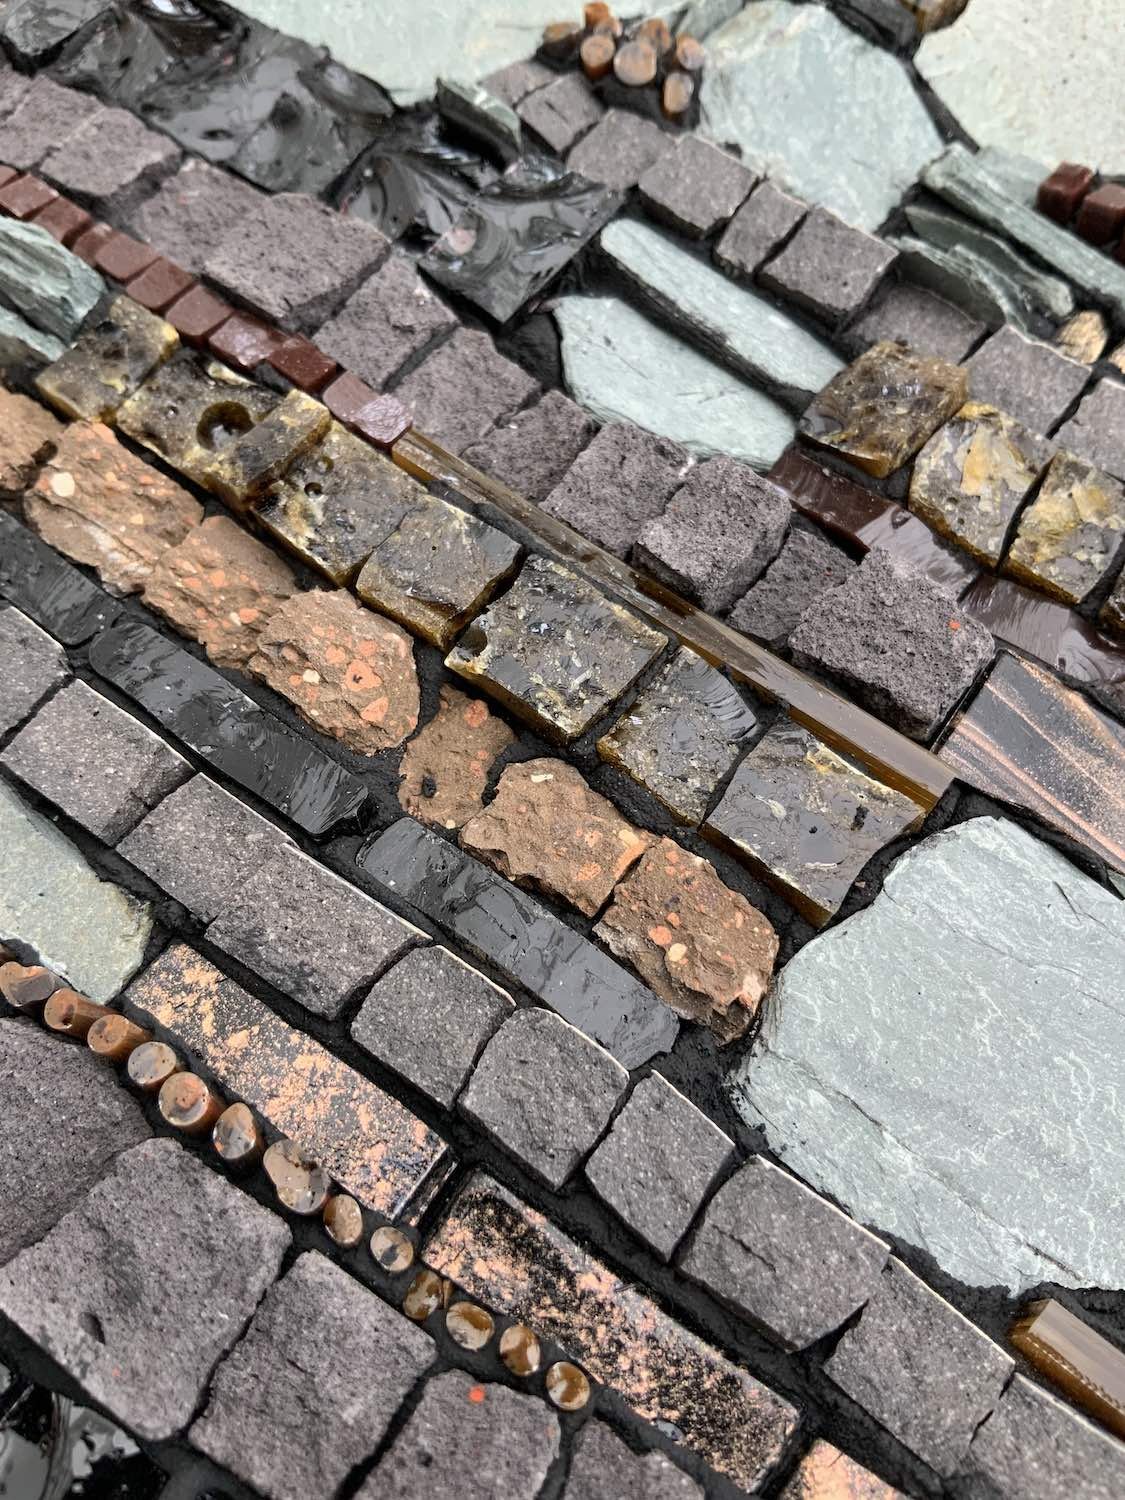
So had a good search through my supplies. This is the stage where being a bit of a hoarder comes in useful! I picked out anything that was the right shade of brown. There were various types of glass and stone, plus I also mixed up some brown adhesive, let it dry out and then cut it up. This combination of materials with all the different shades and surfaces was perfect for my seaweed.
Then came the decisions over the andamento - how should I lay all these materials down? After trying out a couple of different layouts, accompanied by much standing and thinking, I went for for simple lines so that the materials could really do the talking. I laid the lines perpendicular to the flow of the rocks. Initially I tried going in the same direction but it didn’t look right - too much of everything going one way!
With the design decisions made, all that was left to do was to make sure I used a wide variety of materials to create different surfaces and textures. You can see the finished piece below.

Based on this experience, here’s some tips you might find useful.
Take photos when you are out and about - you never know when you might need a bit of inspiration!
If you aren’t ready to commit to making a large piece, try a smaller version first - it means you can experiment with techniques/design etc.
If you are using lots of materials, keep the andamento simple - let the materials do the work.
And finally, if you want to see a short video featuring this mosaic, you can do so here.
This blog post was adapted from one of my weekly emails. If you have enjoyed reading it and would like to receive similar content direct to your inbox, you can subscribe using the form at the bottom of the page.